Most AI video tools work like a slot machine. You type a prompt, hit generate, and hope the output matches what is in your head. Sometimes it does. Usually it does not. So you roll the dice and generate again.
We wanted to prove there is another way. One where you don't just hope the machine figures out what you want.
To do that, we combined the control of 3D with the visual fidelity of video-to-video models. Rendering a blocking pass first and passing that through a video model is called "Neural Rendering."
Step 1: Asset creation
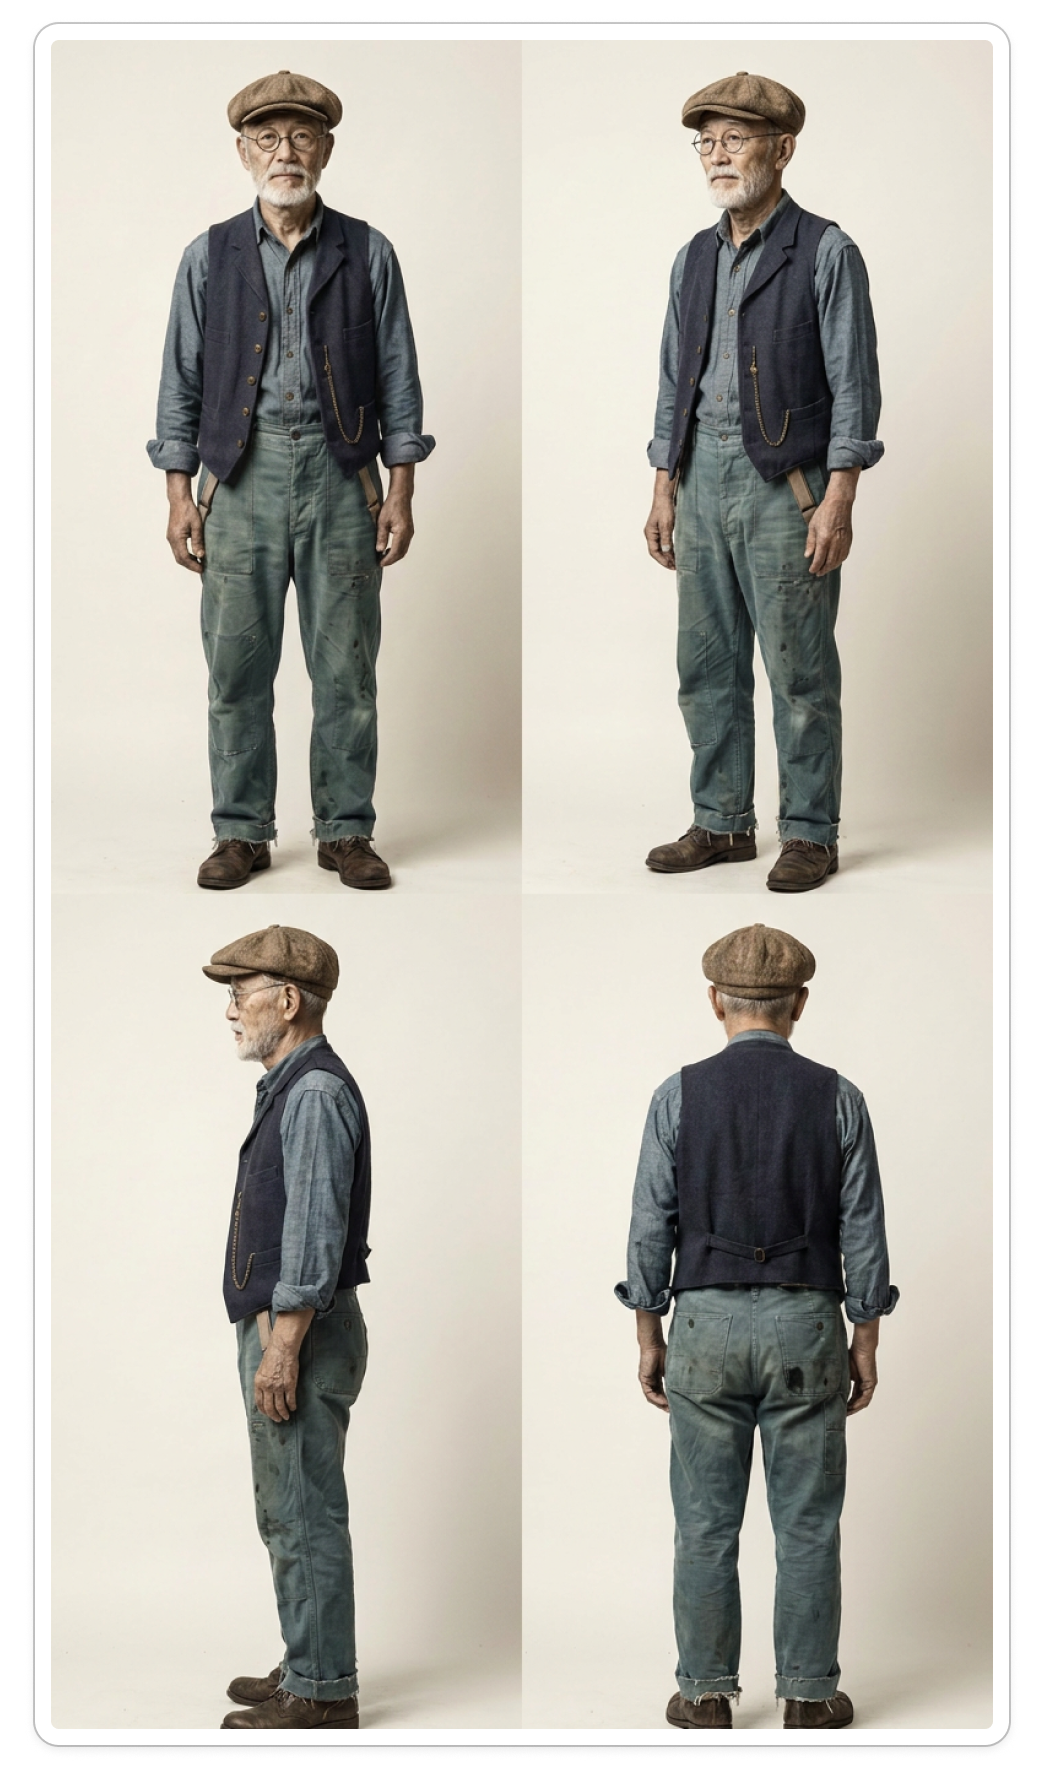
Before touching any generative tool, we wrote the character. We took the time to make a full visual specification:
An elderly Japanese man with a short white beard, round wire-rimmed glasses, and a brown flat cap. He wears a blue chambray shirt with rolled-up sleeves, a dark navy buttoned vest with a pocket watch chain, worn green work trousers with suspenders, and weathered brown leather shoes.
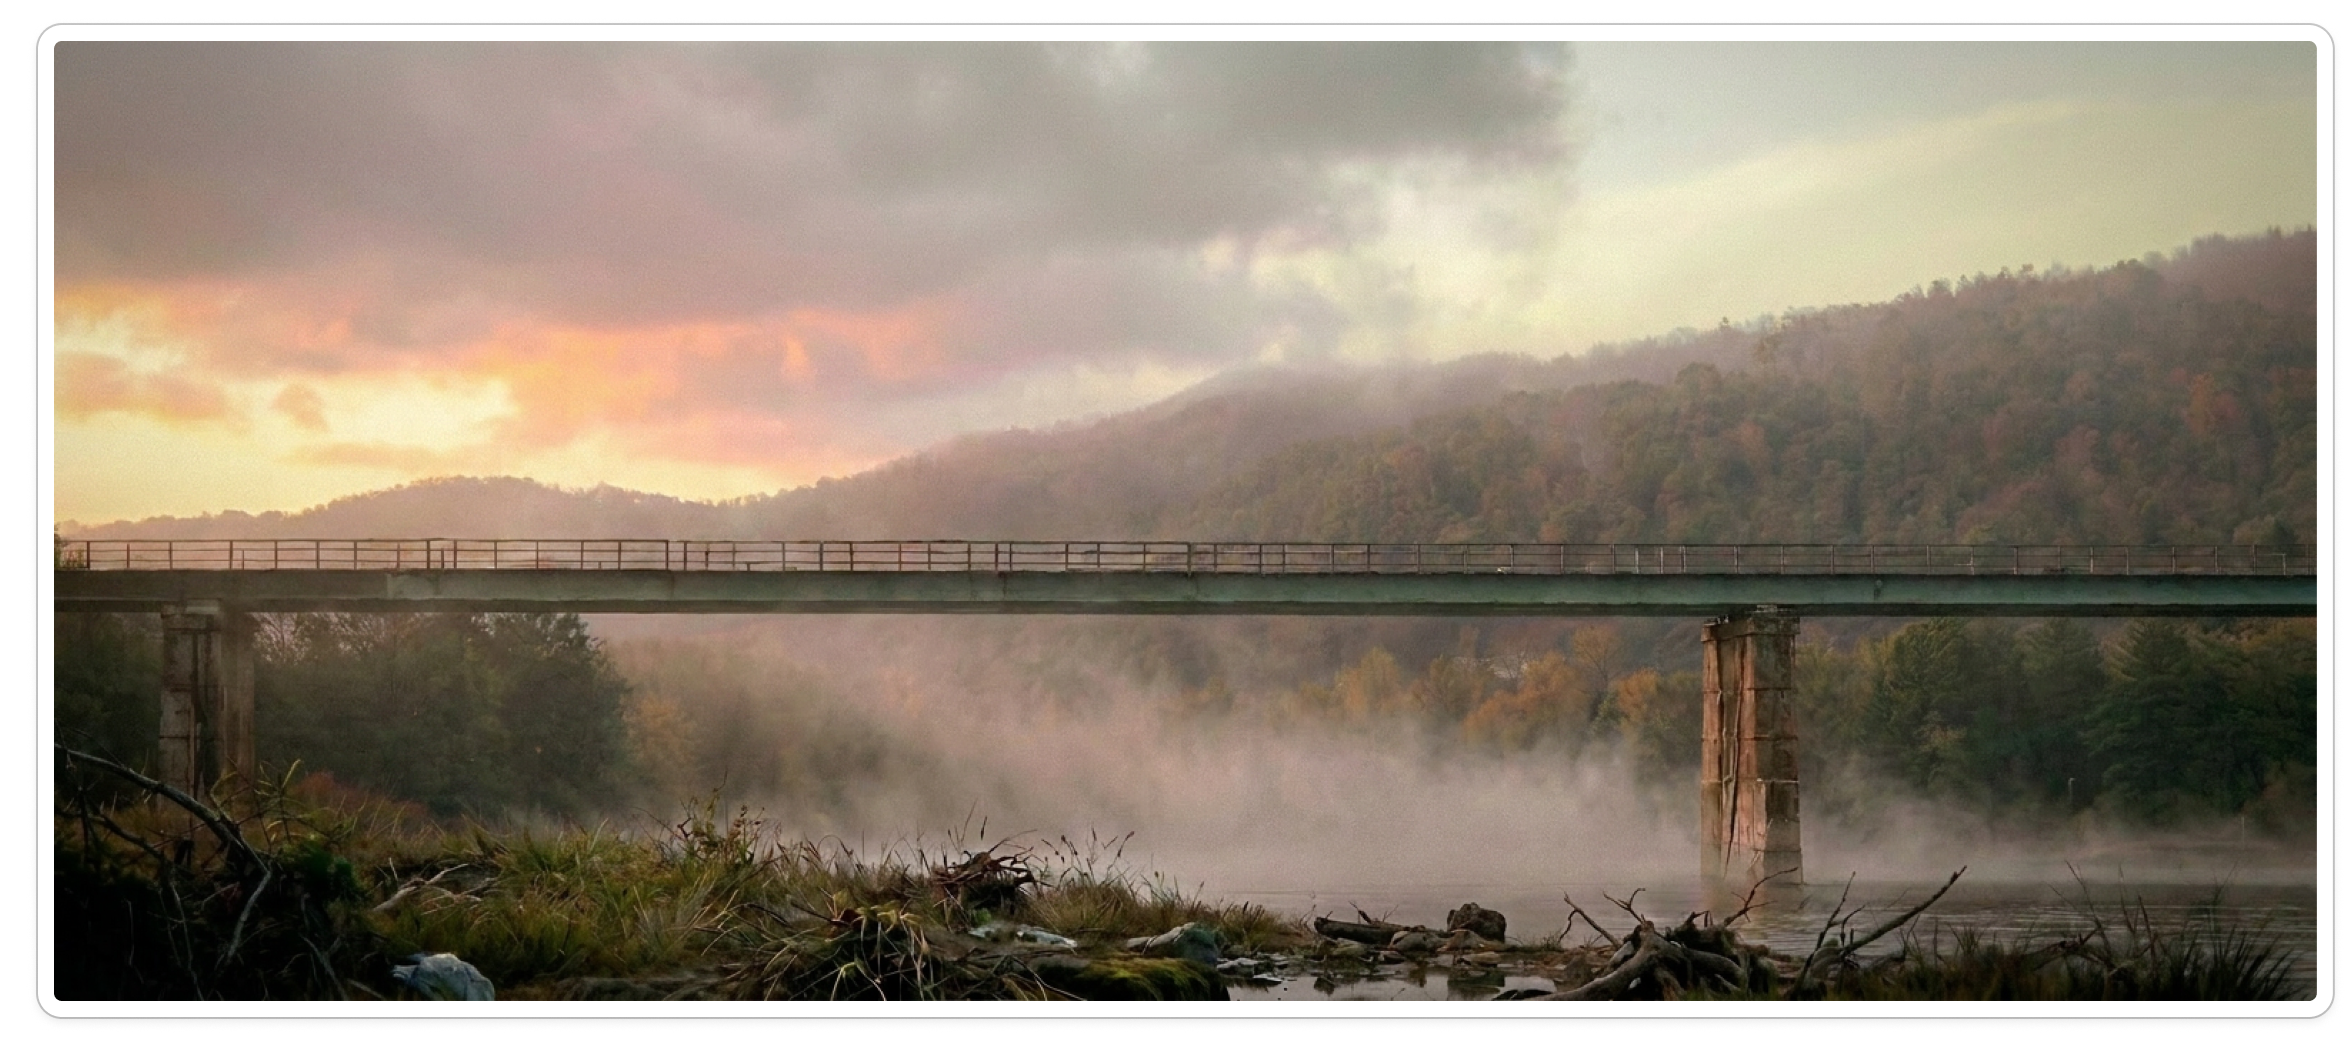
We designed the scene the same way: written first, generated second. We iterated on a standalone landscape image until the composition, lighting, and atmosphere were exactly right. That image became the background plate for the final shot.
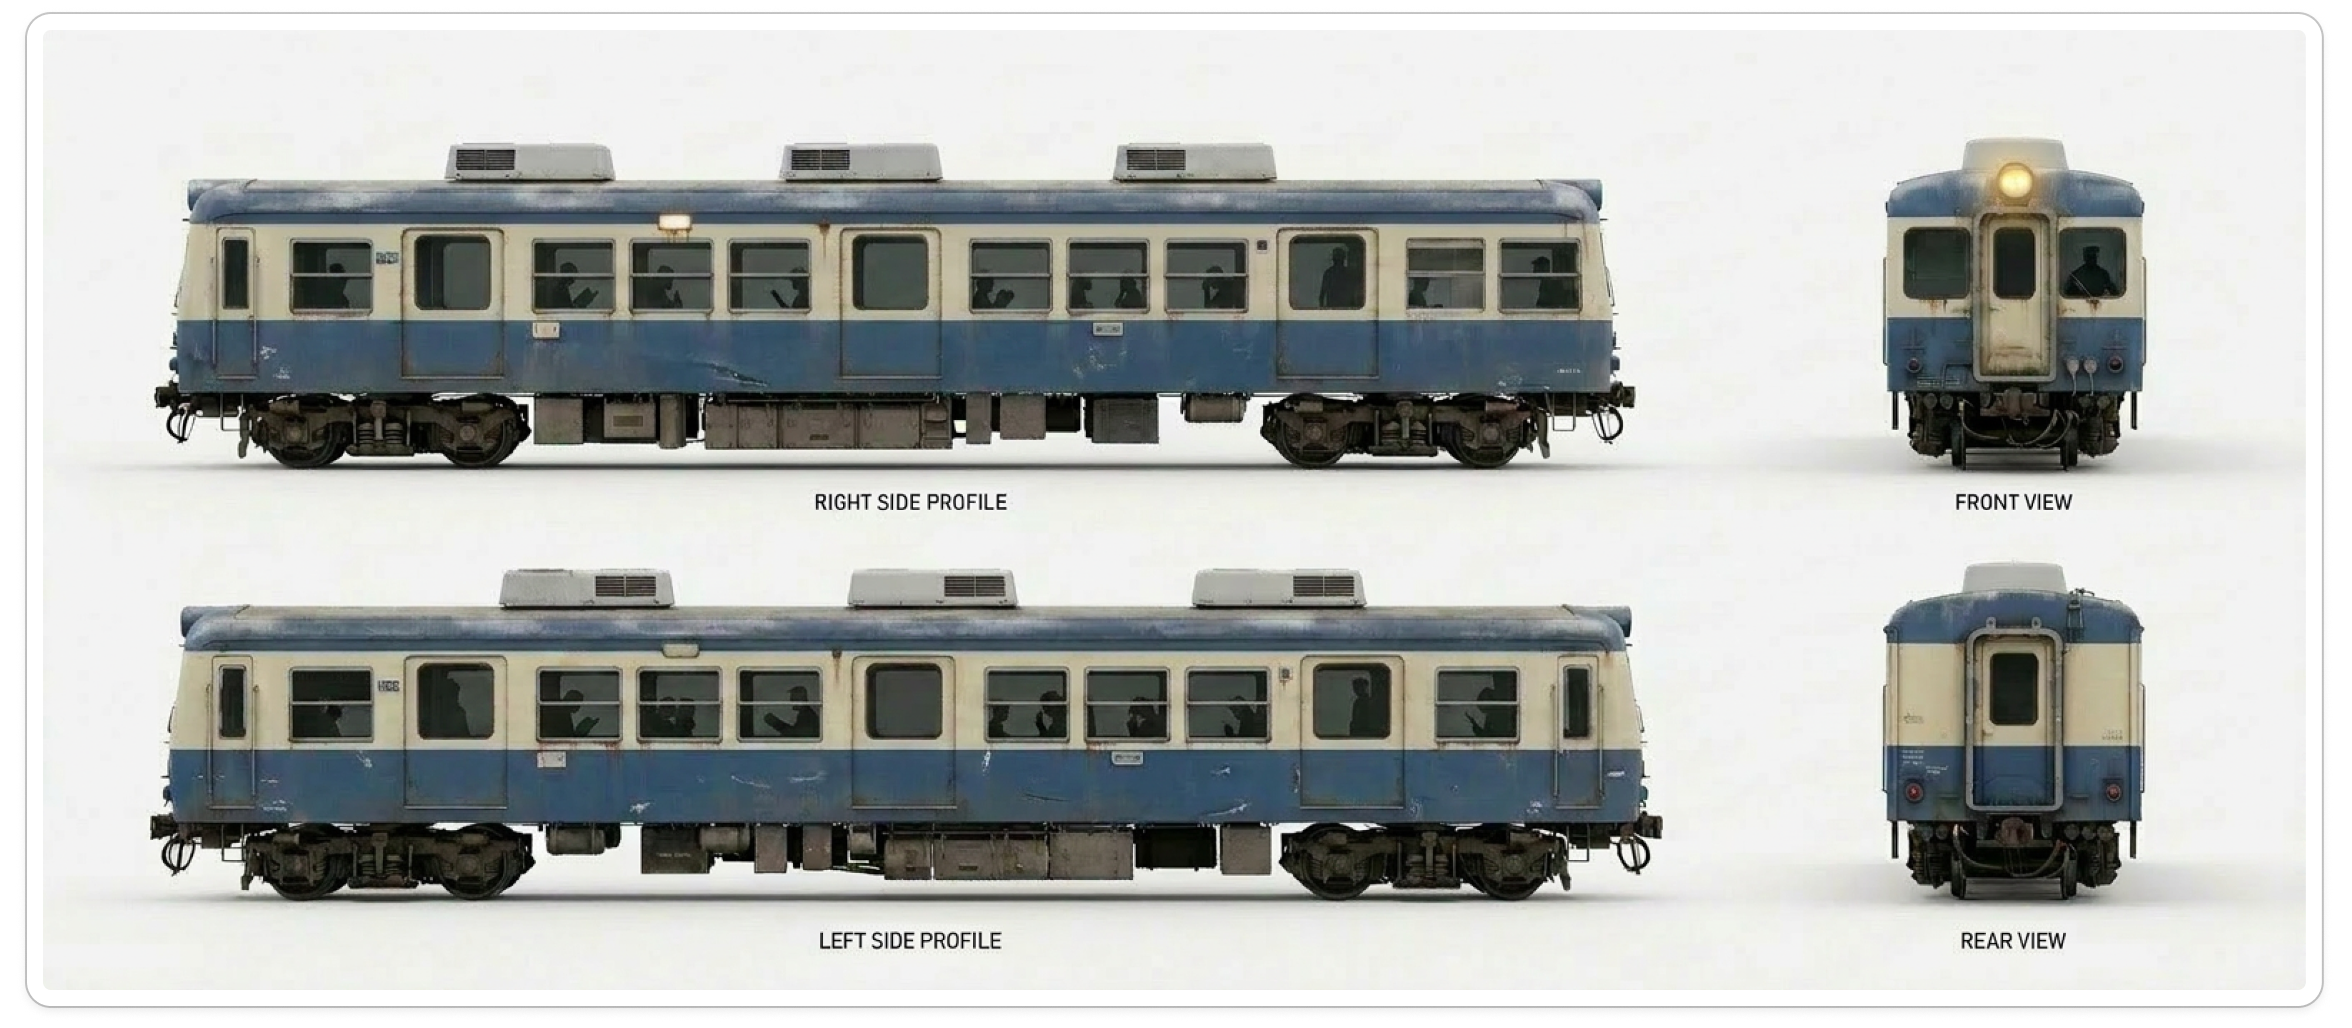
Then we generated a four-view train model sheet: right-side profile, front view, left-side profile, and rear view. Every detail stayed consistent across angles. This is key to ensuring the neural rendering model has enough information to work with.
Step 2: Motion blocking
This is where the process diverges completely from “type a prompt and hope.” We created a 3D blocking pass - a motion reference video using simple placeholder geometry. This was done in Maya, but you could do it in your favorite DCC (we love Blender and the Unreal Engine here at Cartwheel)
Because the character animation is usually where most of the story gets told, we wanted to ensure we didn't just use stock animation from Mixamo. So we used Motion Editor to take full control of the performance, refining motion capture and text-prompt generations until every detail was right.
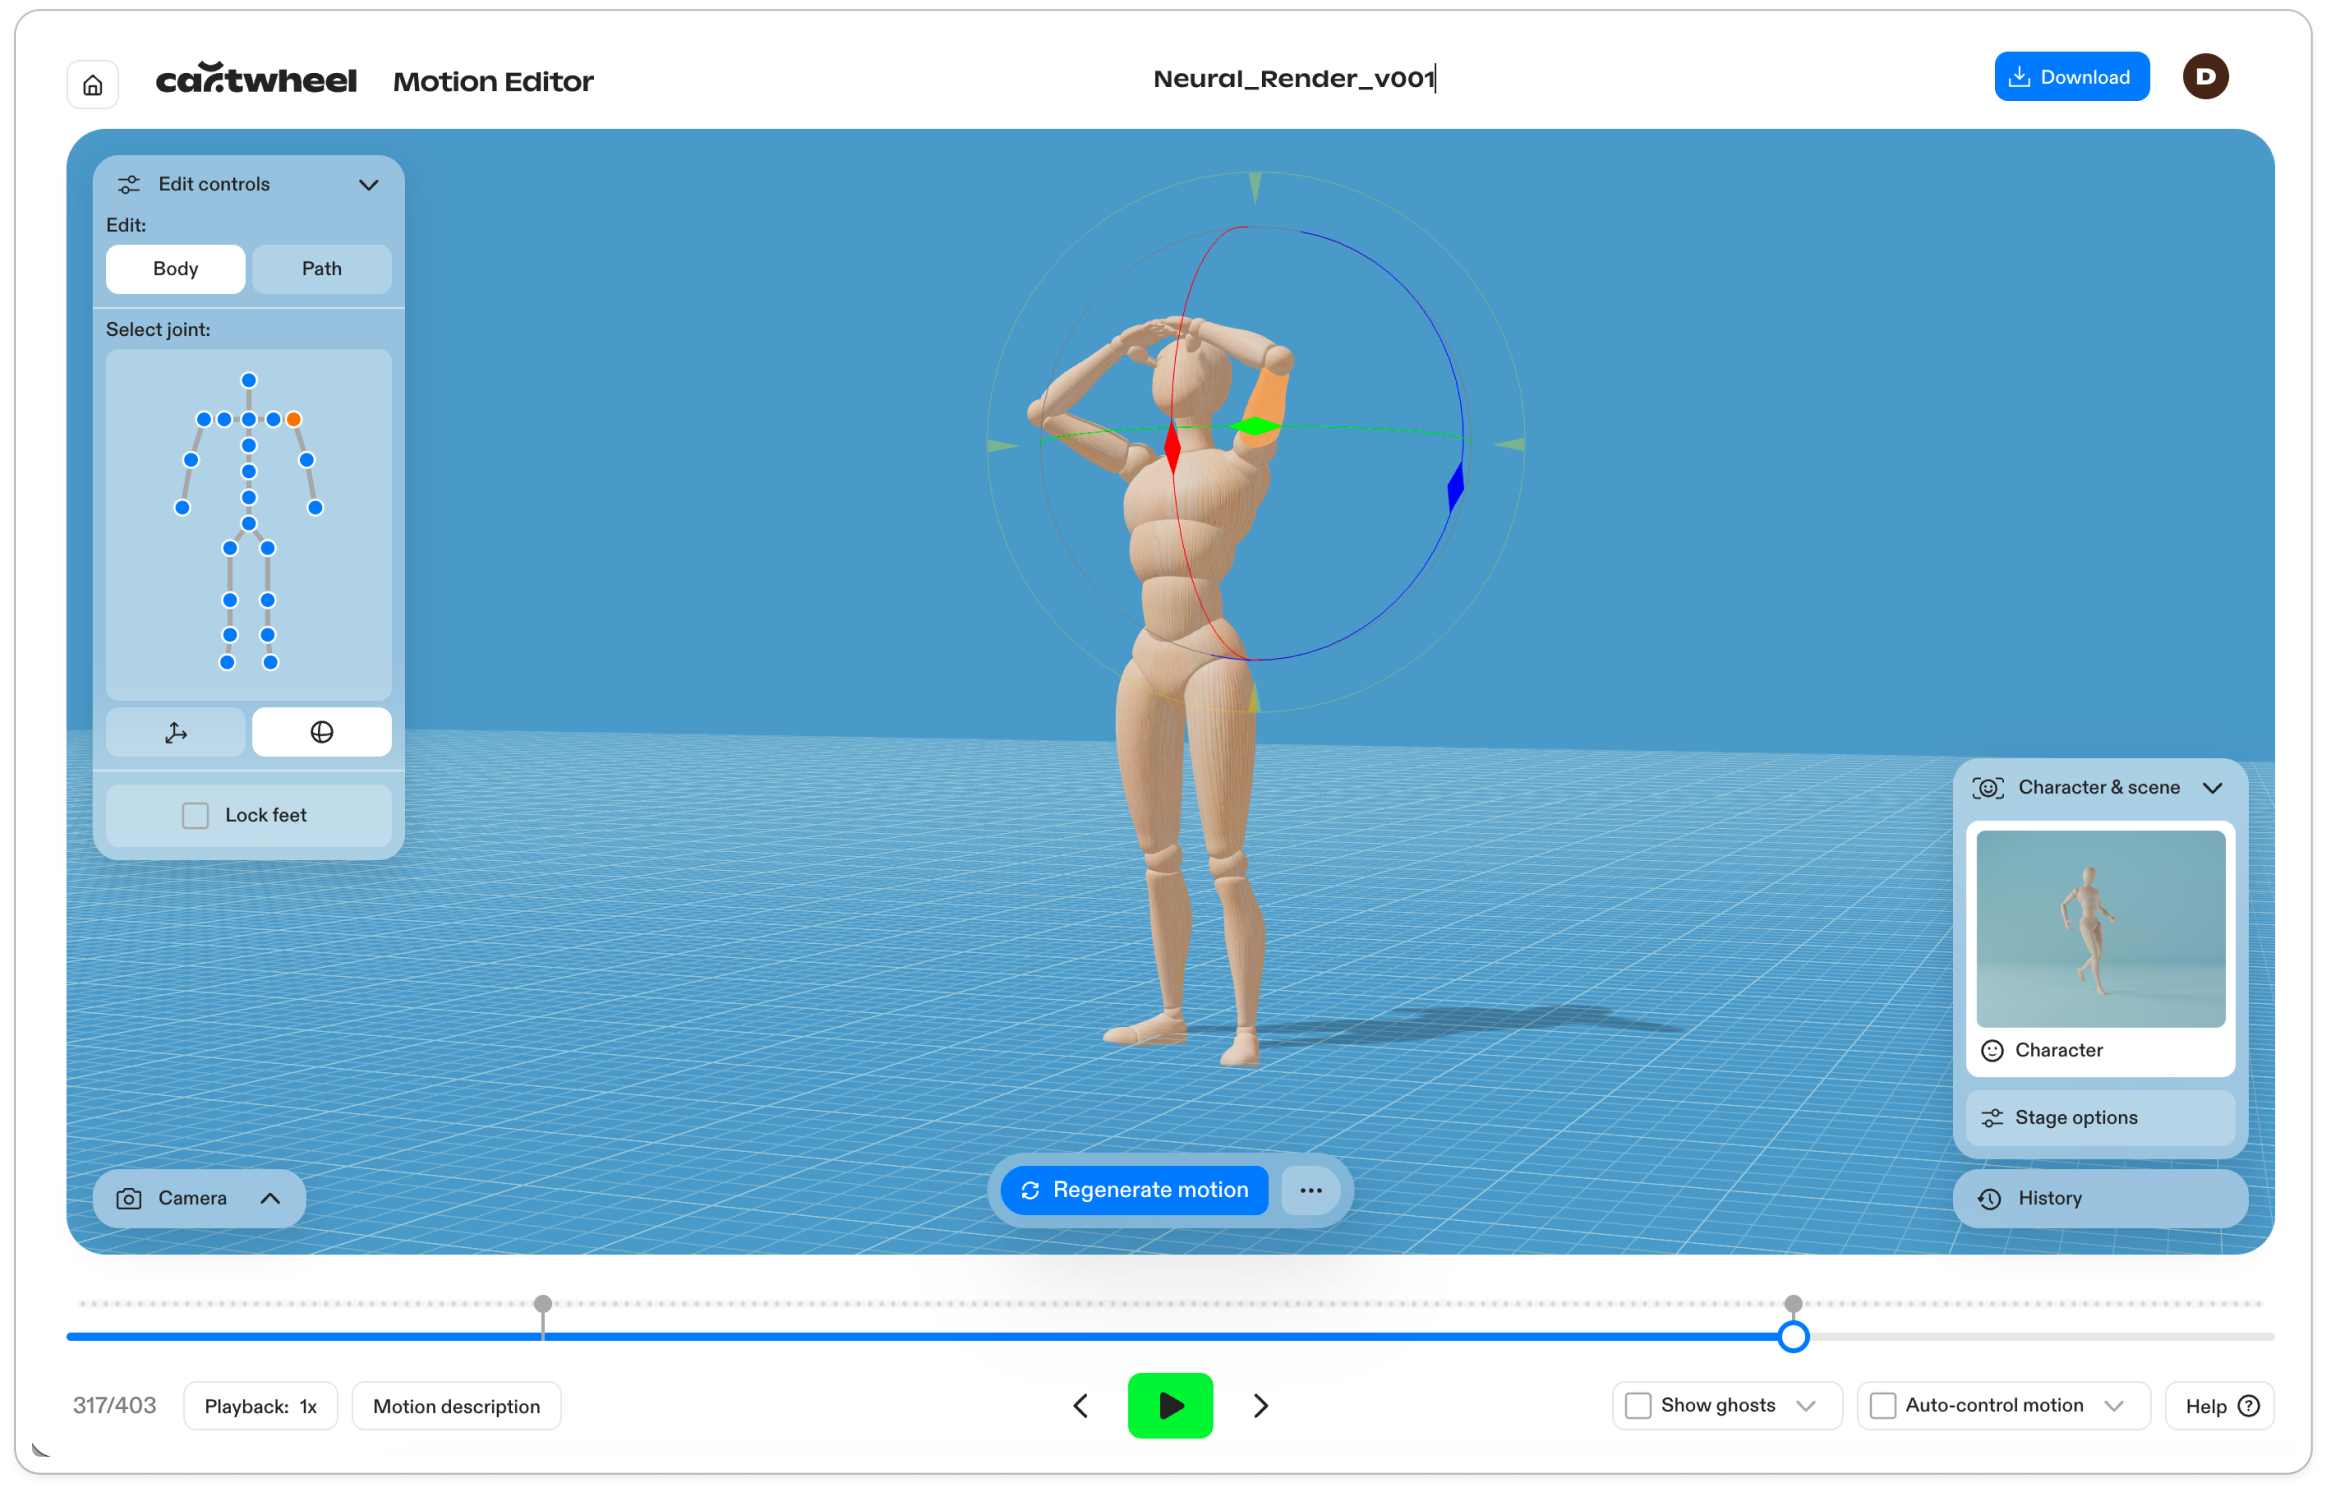
The camera move, character position, train timing, and spatial relationships were all choreographed in 3D before any neural rendering happened. This blocking pass became the motion reference for the final render. The instruction to the model was explicit: follow this motion one-to-one, frame for frame. Match every position, timing, and spatial relationship.
This workflow is a favorite of ours because it doesn't involve guess work, or hoping the video model can read our minds. 3D is the control layer for our little story.
Step 3: Neural rendering
With the character sheet, environment plate, train model sheet, 3D blocking video, and style prompt locked, we fed everything into Seedance 2.0.
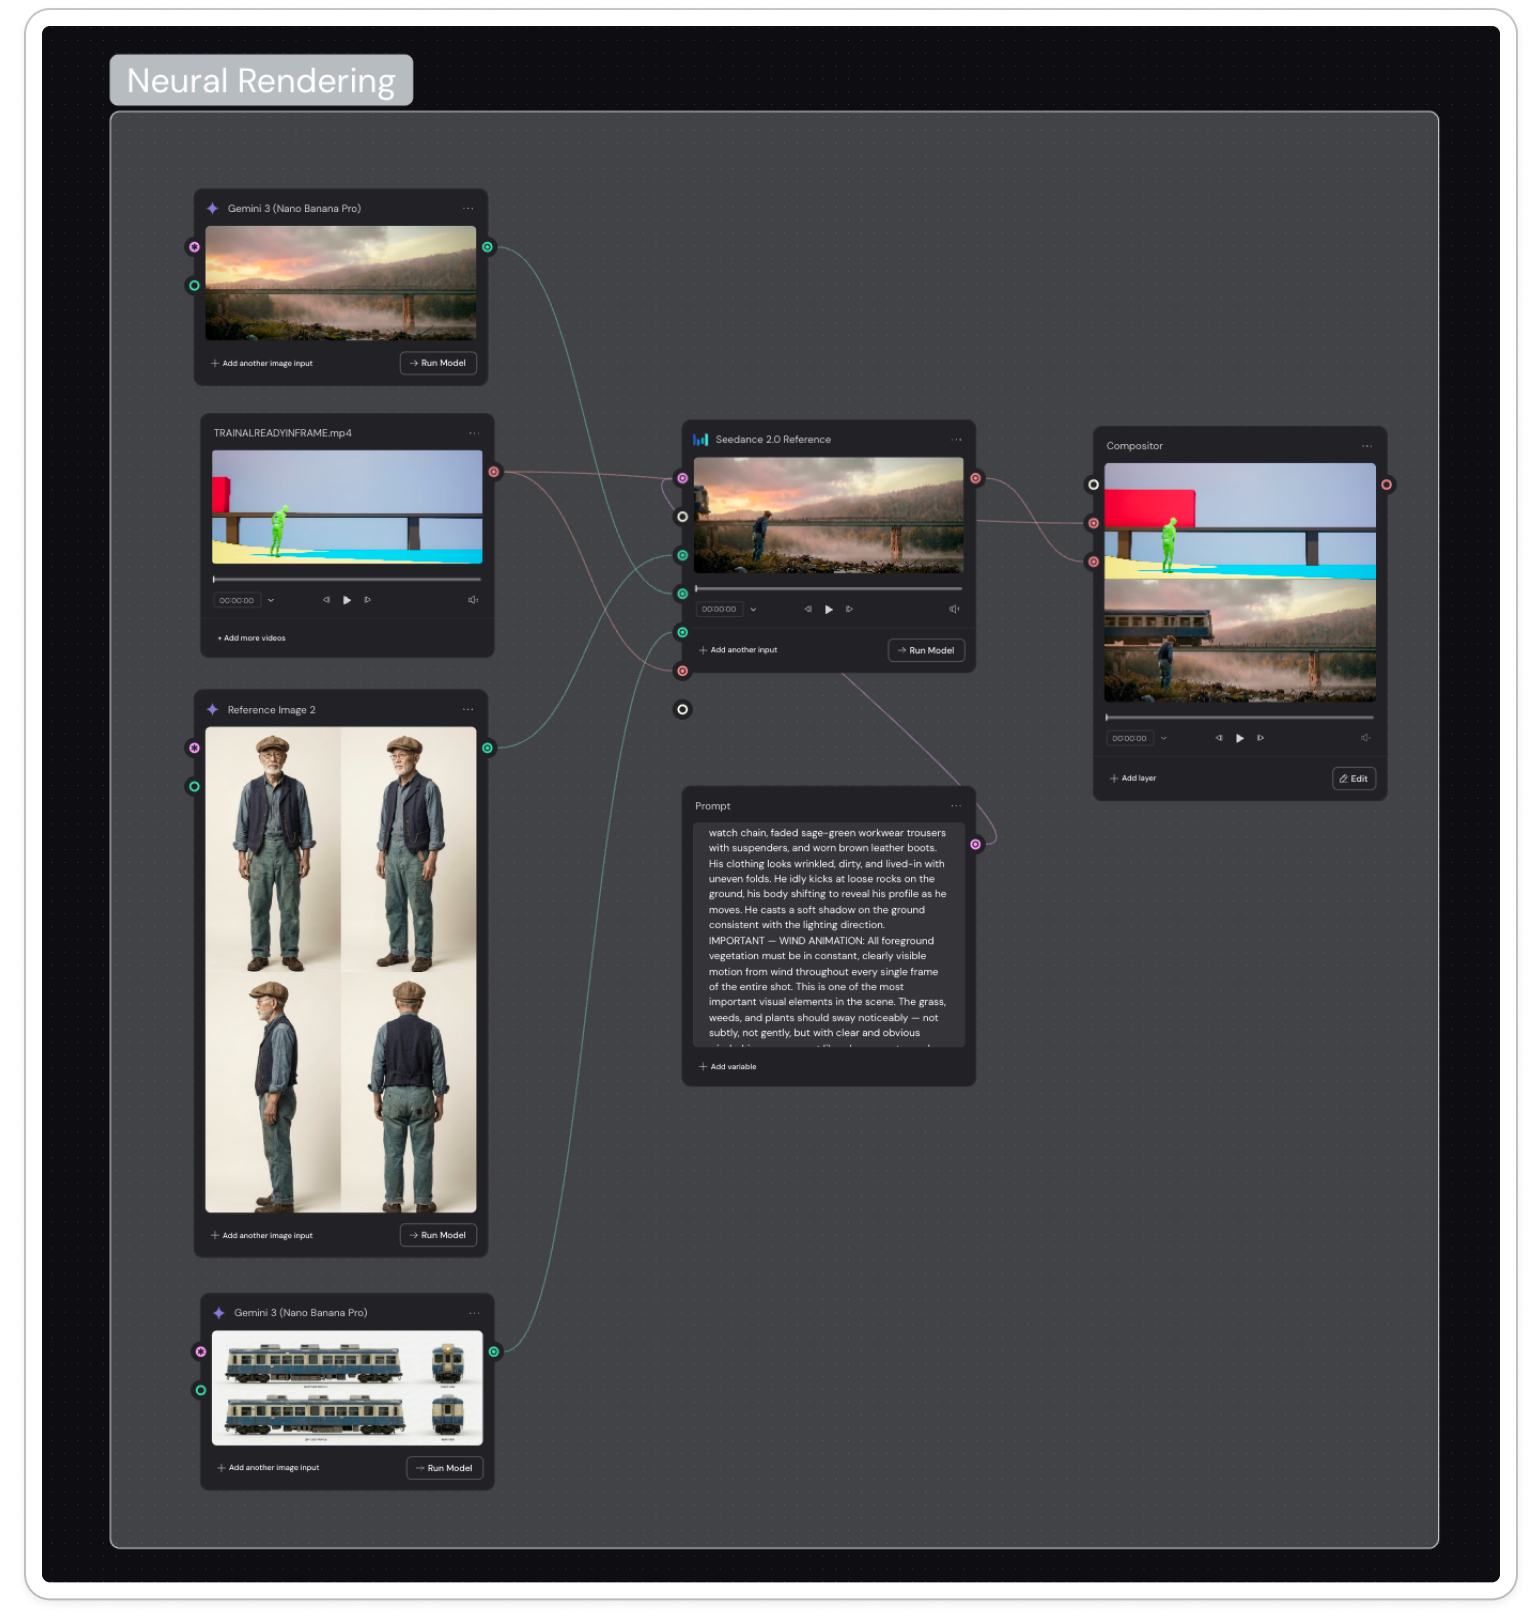
The model received:
- The motion reference video from the 3D blocking pass
- Character reference images from the four-angle model sheet
- Train reference images from the four-view model sheet
- The environment reference plate
- The complete style-directed prompt
This is neural rendering - not “generate a video from a text prompt.” The model synthesizes a final render from multiple controlled inputs: geometry, motion, character design, asset design, environment, and style direction. Each gets specified so we ensure the performance is what we want.
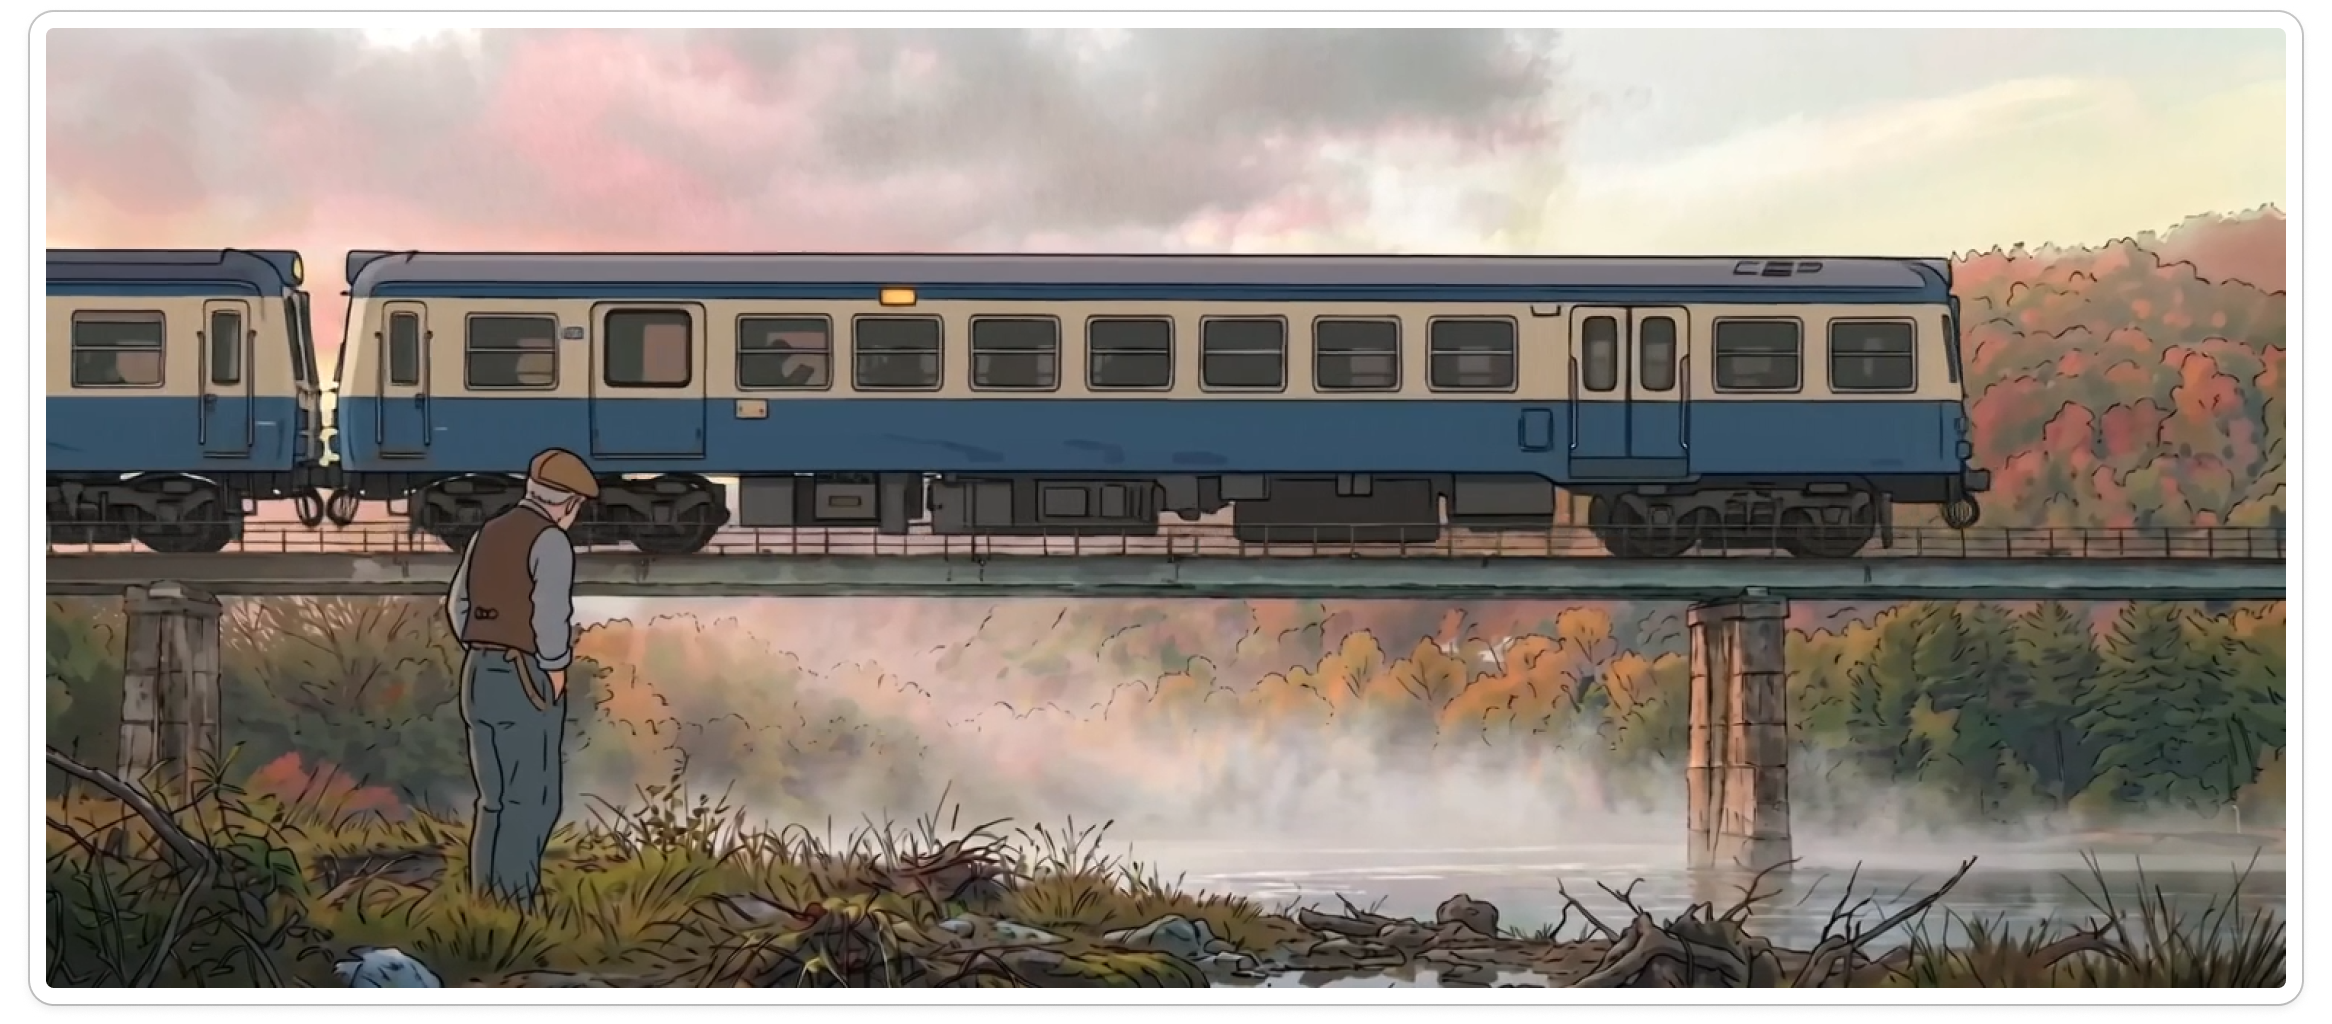
More control, better creative
The better AI models get, the more control matters, not less.
This shot passed through several stages of human decision-making before a single frame was final. We went through character design, environment design, asset design, motion blocking, style direction, and rendering. At every stage, a person made specific, intentional choices about what the shot should look like and how it should move.
The tools that treat the human as the director will produce work that looks like someone made it.
That is what we are building at Cartwheel.